A dense, moist rye loaf that requires no kneading. Water can be replaced with whey left from making tvorog. Using whey adds acidity, minerals, and a subtle fermented flavor while making productive use of a cooking byproduct.
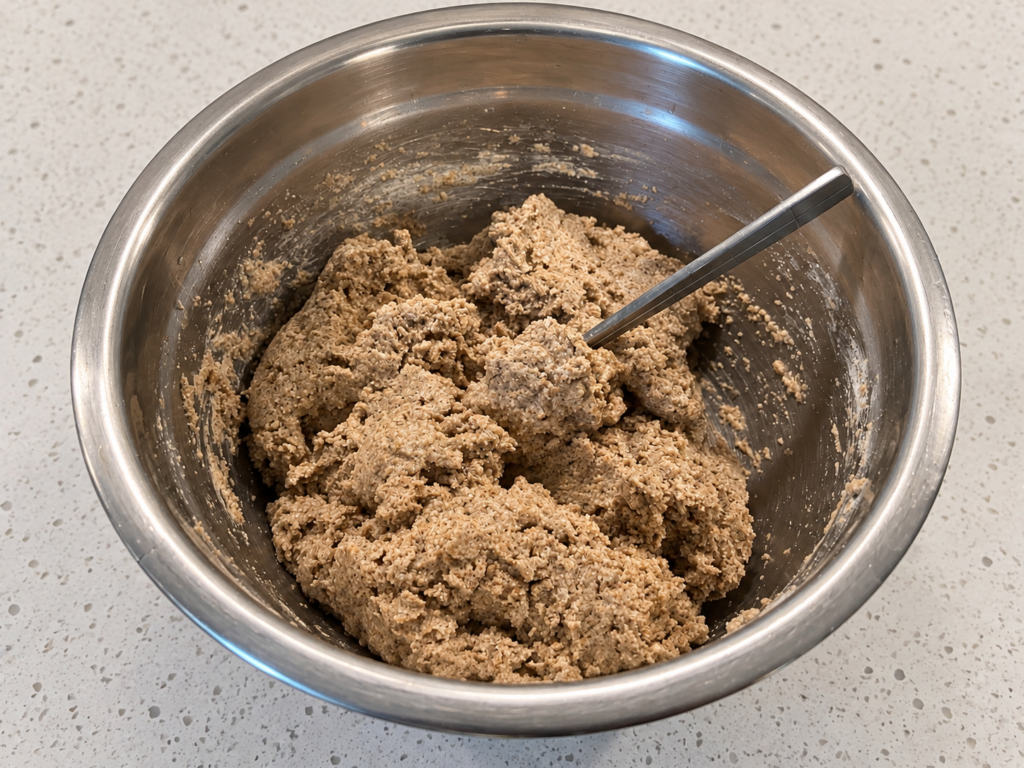
Mix the dough. Combine the rye flour, water or whey, salt, and yeast. Mix until no dry flour remains. Rye dough will resemble a thick paste rather than elastic wheat dough. The yeast may be omitted, but spontaneous fermentation can take up to 48 hours. Its speed depends primarily on temperature and the microorganisms naturally present in the flour and surrounding environment.
Ferment for at least 12 hours. Cover the bowl with foil or a lid and leave it at room temperature for about 12 hours. The dough should become visibly aerated, slightly expanded, and noticeably more aromatic.
Add the flavoring. When the dough looks ready, mix in the caraway, thyme, or sesame seeds. Three tablespoons produce a distinct flavor without overwhelming the rye.
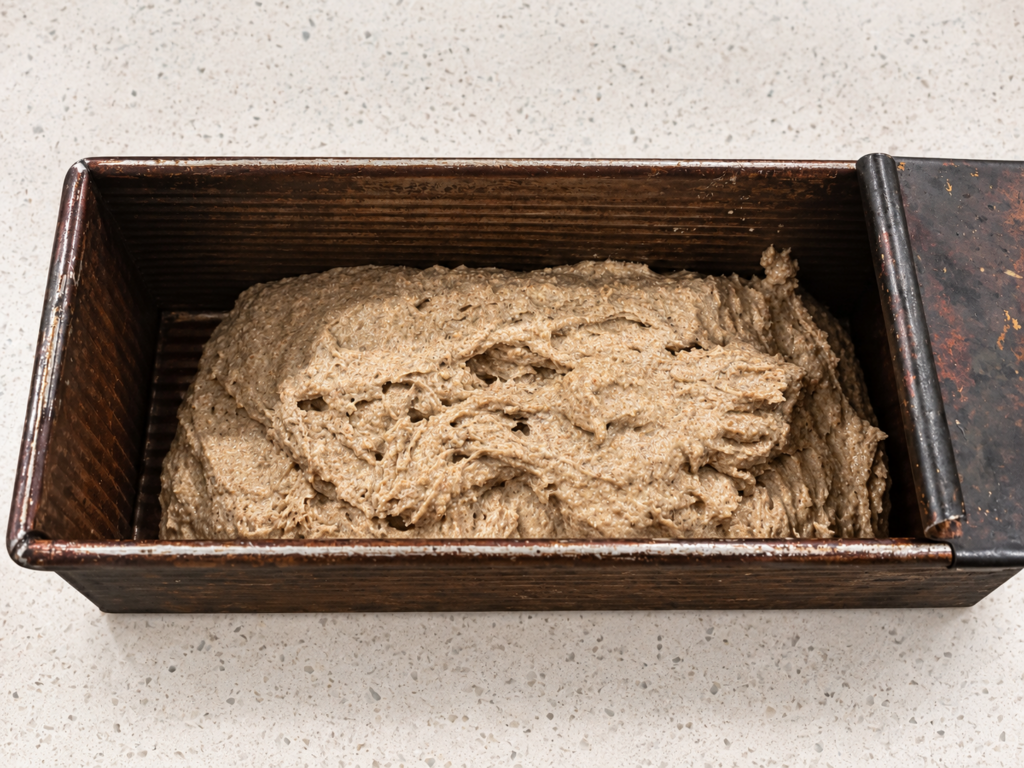
Transfer the dough to the form and proof. Transfer the dough to a greased baking form with an oven-safe lid. Smooth the surface with a wet spoon or spatula. Cover and leave for at least 2 hours to rise again. It may also be left overnight if convenient. For a morning bake, place the covered form in the oven before going to bed and use the oven’s automatic start function, if available.
Bake covered. Bake with the lid closed at 400°F (205°C) for 50 minutes. For a cold-oven start, place the covered form in the oven and set it to run for 1 hour at 400°F. If the oven takes approximately 15 minutes to heat, the bread will receive about 45 minutes at full temperature.
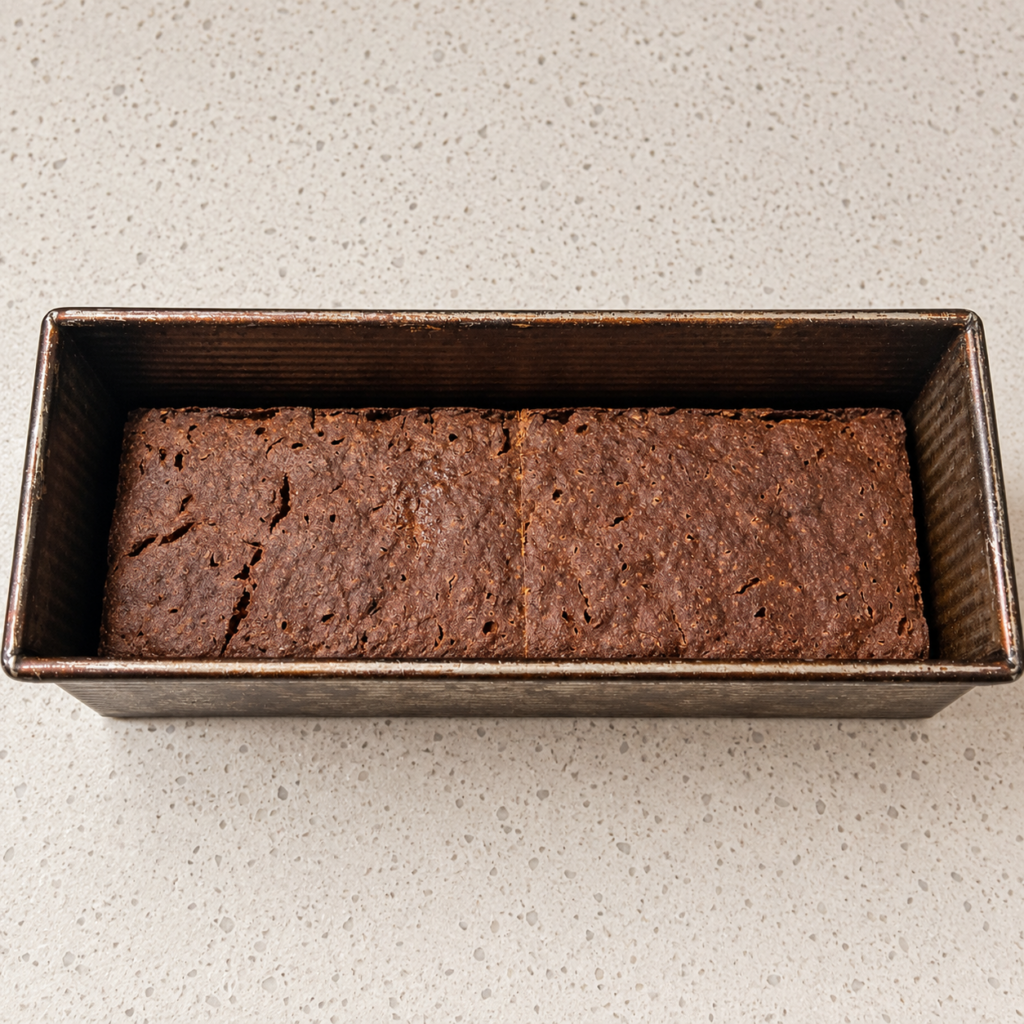
Finish uncovered. When the covered baking cycle is complete, the bread should be baked through but may not yet have a firm, attractive crust. Remove the lid, reduce the temperature to 350°F (175°C), and bake for another 30 minutes. Alternatively, use a thermometer and stop baking when the internal temperature reaches approximately 190°F (88°C).
Cool. Let the loaf rest in the form for 10 minutes, then remove it and cool completely on a wire rack before cutting. Ideally, wait several hours or until the following day. Rye starches continue setting as the loaf cools, producing cleaner slices and a less sticky crumb.
rye dough raised in form
Why This Works
Rye contains little gluten capable of forming an elastic structure, so kneading provides almost no benefit. The high hydration allows rye pentosans and starches to bind water, while the long fermentation develops acidity and flavor. Baking under a lid limits early moisture loss; the uncovered final stage firms and dries the crust.
Storage
Keep the fully cooled loaf wrapped or in a bread box for 3–4 days. Rye bread usually tastes better on the second day. For longer storage, slice and freeze it so individual pieces can be toasted directly from frozen.
Scientific Note
Rye flour contains much less gluten-forming protein than typical white bread flour—approximately 2.8% compared with 9–14%, depending on the flour and how the protein is measured. This is why pure rye bread is difficult to produce commercially because rye flour behaves very differently from wheat flour. Many store-bought rye breads are therefore colored versions, blended with wheat flour or other grains to improve their structure and handling.
This rich, rustic soup combines tender potatoes, sweet vegetables, and generous pieces of wild mushroom. Briefly simmering the thawed mushrooms helps them firm up before they are browned in butter, giving the finished soup a deeper flavor and a satisfying texture.
Ingredients
600 g wild mushrooms, cleaned, sliced, and well thawed if previously frozen. Do not discard liquid released while the mushrooms thaw
2 liters mild chicken broth
1 small onion, finely chopped
1 small carrot, finely diced
2 small potatoes, peeled and diced
3 tablespoons butter, divided
Salt and freshly ground black pepper, to taste
For serving:
Sour cream
Fresh green onions or raw onion
Salt, for dipping the onion
Preparation
Thaw the mushrooms and reserve the liquid. Thaw the mushrooms in a bowl and collect all the liquid they release.
Begin the soup. Pour the chicken broth into a large pot and bring it to a gentle boil. Add the mushroom liquid.
Cook the potatoes. Add the diced potatoes to the broth and simmer for 5–7 minutes, or until they begin to soften.
Prepare the vegetables. While the potatoes cook, melt 1 tablespoon of the butter in a large, wide frying pan over medium heat. Add the onion and carrot and cook until softened and lightly browned, about 5 minutes. Transfer the vegetables to a plate, leaving the pan ready for the mushrooms.
Briefly boil the mushrooms. Cut the thawed mushrooms into pieces 5–7 mm thick if they are not already sliced. Cut thick stems into substantial rounds. Add the mushrooms to the simmering broth. Cook them for 1–2 minutes, until they rise to the surface. This brief boiling step is essential: it helps the mushrooms release excess moisture and firm up before browning.
Brown the mushrooms. Remove the mushrooms from the broth with a slotted spoon and transfer them directly to the hot frying pan. Melt the remaining 2 tablespoons of butter in the frying pan, then add the mushrooms and the cooked onion and carrot. Spread everything into a single layer and cook over medium-high heat for about 5–7 minutes. Stir very minimally, allowing the mushrooms to develop a golden-brown surface without breaking apart or steaming.
Finish the soup. Return the browned mushrooms, onion, carrot, and all the butter and pan juices to the pot. Simmer for 1–2 minutes, or until the potatoes are fully tender. Season with salt and freshly ground black pepper.
Serve. Ladle the soup into bowls and serve hot with sour cream. Offer fresh green onions or pieces of raw onion on the side, lightly dipped in salt.
Scientific note: Why This Method Works
Thawed mushrooms can easily become soft, watery and loose the structure. Briefly simmering them first helps release excess liquid and gives them enough structure to withstand browning.
Cooking the mushrooms in a wide pan allows moisture to evaporate quickly, creating deeper roasted flavors. Minimal stirring keeps the pieces intact and helps them remain in contact with the hot surface.
Butter is especially well suited to this soup. Its milk solids brown beautifully and complement the earthy mushrooms, while its rich flavor pairs naturally with sour cream.
A magnetic dry-erase board on the refrigerator is surprisingly useful. You can write down recipes, daily plans, shopping lists, or love notes.
Magnetic markers make it even better: they are always beside the board, ready to write.
The eraser is usually the weak point. Small magnetic erasers are inconvenient, while comfortable full-size erasers often have no magnet and inevitably disappear into a drawer.
The solution is simple: cut a credit-card-sized piece of self-adhesive magnetic sheet and attach it to the back of a regular large eraser. Now the eraser stays on the refrigerator beside the board and markers.
A five-minute modification that makes the entire system work properly.
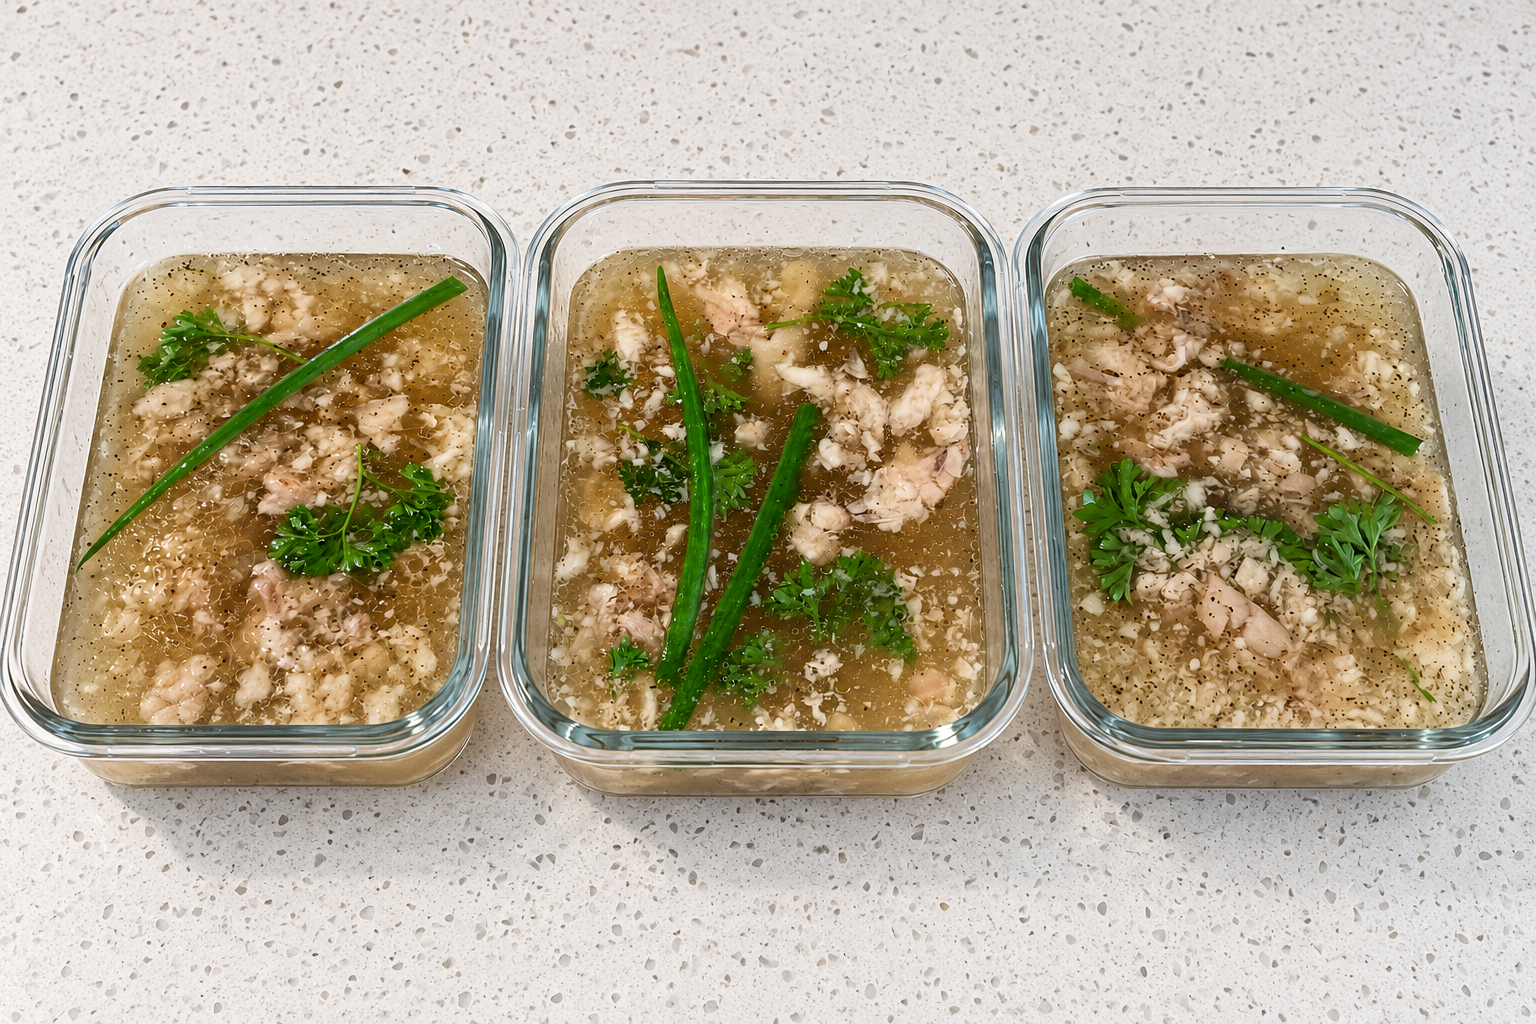
This recipe uses three stages: blanching, pressure-cooking, and final conditioning. Blanching removes odors and stray proteins, pressure-cooking extracts gelatin from the pork feet, and final conditioning enriches the broth with spices while keeping their flavors potent and preventing the vegetables from overcooking.
Yield
850 g (~2lb) of pig feet produces about three shallow containers.Total yield: about 1.8 kg of aspic.
Ingredients
850 g pork feet, approximately 2 lb; try to choose one of the smallest packages commonly available at a grocery store
Plenty of cold water for blanching
Approximately 1.5 liters of fresh water for pressure-cooking
Seasoning for approximately 1.5 liters of broth
1 teaspoon salt
½ teaspoon ground black pepper
½ onion, left whole for easy removal
1 celery stalk, cut into large pieces
1 small carrot, sliced into rounds
Several sprigs of dill or parsley
Preparation
1. Blanch the pork feet—really important!
Place the pork feet in an ordinary cooking pot and cover them with plenty of cold water. Bring the water to a boil and boil vigorously for 3–5 minutes.
Discard this water and rinse the pork feet. This removes coagulated blood, stray proteins, and some of the stronger pork aroma, producing a cleaner broth.
2. Extract the gelatin
Transfer the blanched pork feet to the Instant Pot. Add approximately 1.5 liters of fresh water, or enough to cover the pork feet without exceeding the maximum-fill line. This is about twice the weight of the initial meat.
Do not add salt or seasonings at this stage.
Cook on High Pressure for 90 minutes, then allow the pressure to release naturally.
Waiting to add the seasonings makes the final seasoning easier to control because the exact broth volume is not yet known. It also prevents the spices from losing their potency during prolonged cooking.
3. Strain the broth
Once the pressure has released normally, pour the liquid through a fine strainer. The pork feet will remain in the strainer.
You should now have approximately 1.5 liters of relatively clean, gelatin-rich broth. Leave the meat to cool while conditioning the broth.
4. Condition and season the broth
Return the strained broth to the Instant Pot or another pot. Do not use high pressure at this stage.
Add:
1 teaspoon salt
½ teaspoon black pepper
½ whole onion
Celery pieces
Carrot rounds
Cook for approximately 10 minutes, or just long enough to develop a coherent, well-seasoned broth.
Strain the broth again through a fine strainer. Remove the onion and celery. The carrot slices may be returned later for decoration.
5. Separate the meat
While the seasoned broth is cooling, separate the cooked meat, skin, and softened connective tissue from the bones. Discard all bones and hard pieces.
From 850 g of fresh pork feet, the usable cooked yield was approximately 450 g, which was divided among three containers.
6. Assemble the aspic
Divide approximately 150 g of cooled meat among each of three glass containers.
Pour approximately 450 ml of seasoned broth into each container. Keep the layers relatively shallow so that the aspic cools evenly and is easy to portion.
Add the previously boiled carrot rounds and small fresh sprigs of dill or parsley for appearance and flavor.
7. Chill
Allow the containers to cool briefly, then cover and refrigerate until completely set, preferably overnight.
The aspic should solidify naturally without added commercial gelatin.
Storage
Keep covered in the refrigerator and consume within 3–4 days.
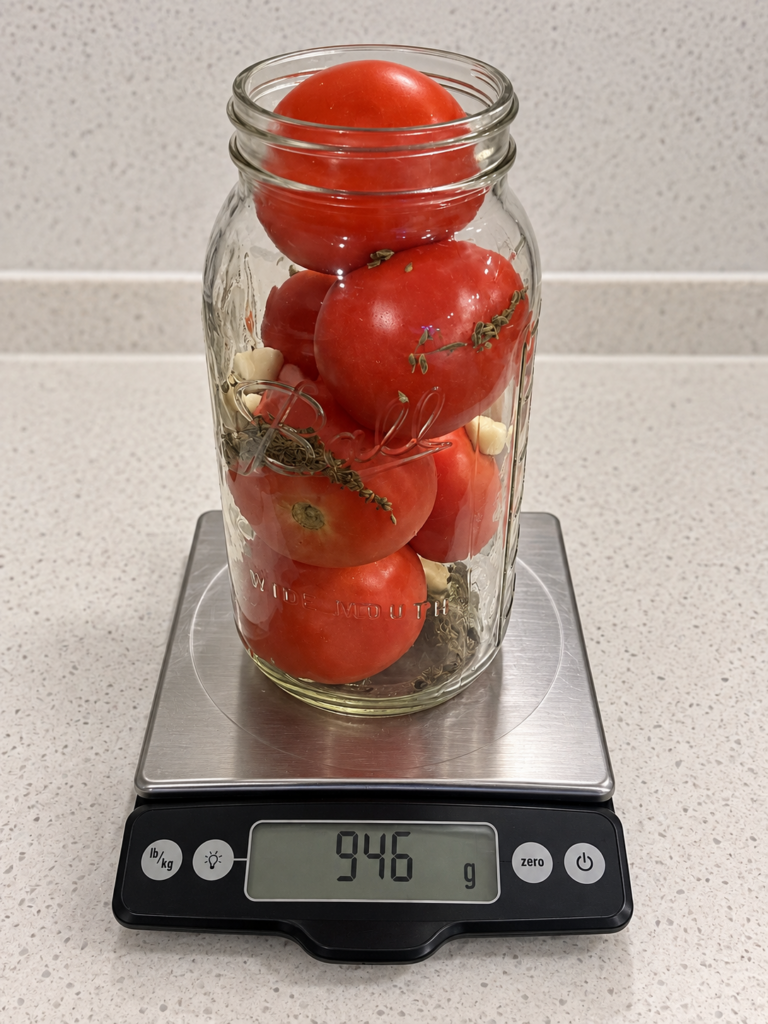
Two 2-quart jars. These jars fit together in the large heating pot. Approximately one full 1.7-liter kettle of boiling water is enough to fill the spaces around the tomatoes.
Ingredients
Per 2-Quart Jar
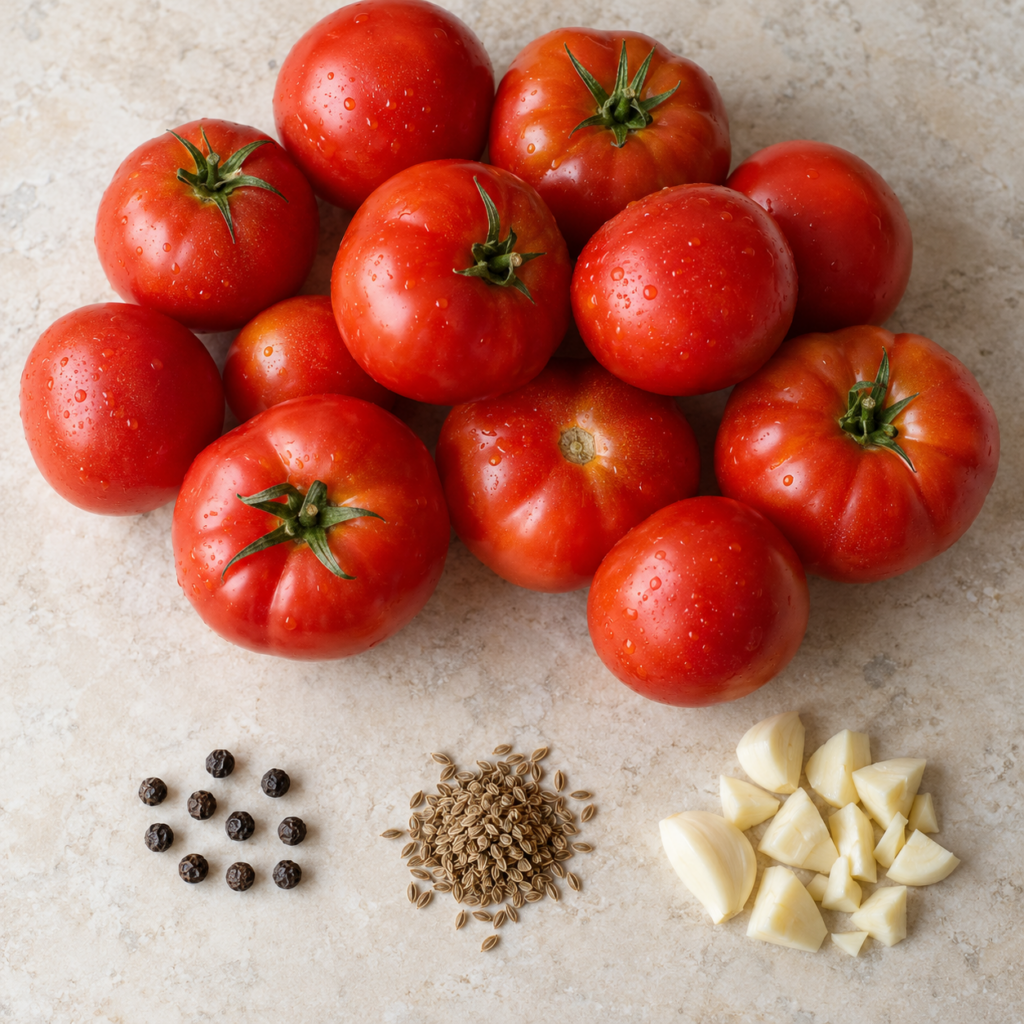
About 950 g tomatoes
10 black peppercorns
1/2 teaspoon dill seeds
3 large garlic cloves, about 12 g, coarsely chopped
Brine for Two Jars
Approximately 120 g pickling salt, about 4 heaping tablespoons
60 g 5% white vinegar, about 4 tablespoons
Water drained from the two filled jars
Procedure
Add water to a large, wide pot to approximately one-quarter of the jars’ height. Bring it to a simmer.
Primary sterilization: Place two empty jars in the pot and heat them for 10 to 15 minutes. Heat the lids and screw bands in the same water.
Wash the tomatoes and place them on a clean cloth to drain and dry slightly.
Make sure there are no cuts, cracks, or rotten areas.
Slightly soft areas are acceptable if the skin is intact and there are no signs of spoilage.
After 15 minutes at a simmer, remove the hot jars and allow them to cool for about one minute. If preparing another batch, place the next two jars in the pot.
Bring a full 1.7-liter kettle of water to a boil.
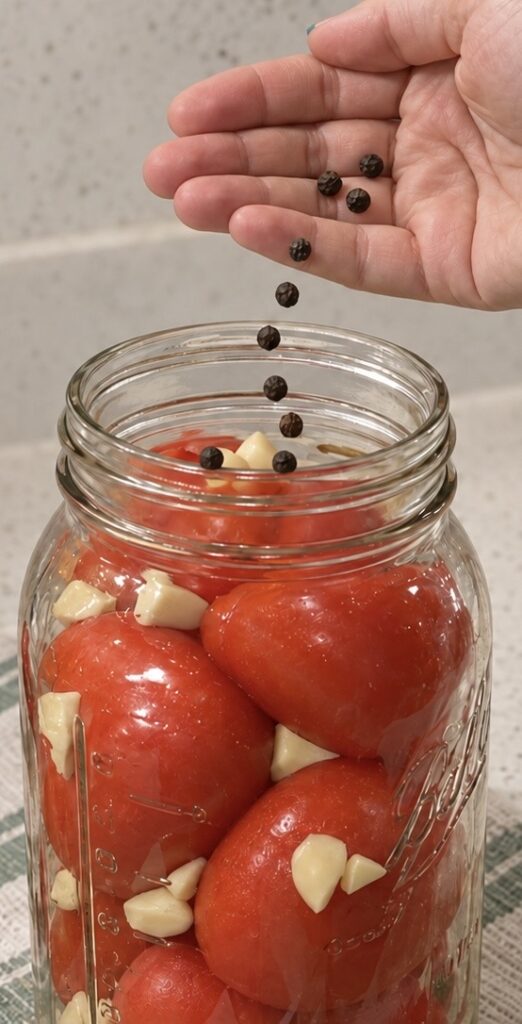
Pack each warm jar in the following order:
Tomatoes
Coarsely chopped garlic
Dill seeds
Black peppercorns
Secondary sterilization: Fill the packed jars with boiling water from the kettle and cover loosely with the lids. Keep cloth around as liquid drips a lot.
Leave the 2-quart jars covered for 15 minutes. For 1-liter jars, use 10 minutes. This heats the tomatoes and jars throughout and reduces surface contamination.
Drain the water from both jars into a 4-liter saucepan.
Add 120 g pickling salt and bring the liquid to a boil.
Only after the brine reaches a boil, add 60 g of 5% vinegar and immediately remove the saucepan from the heat. Acetic acid is volatile, so adding the vinegar last minimizes its loss.
Tertiary sterilization: Pour the hot brine back into the jars, leaving approximately 5 mm of headspace. Seal the jars immediately.
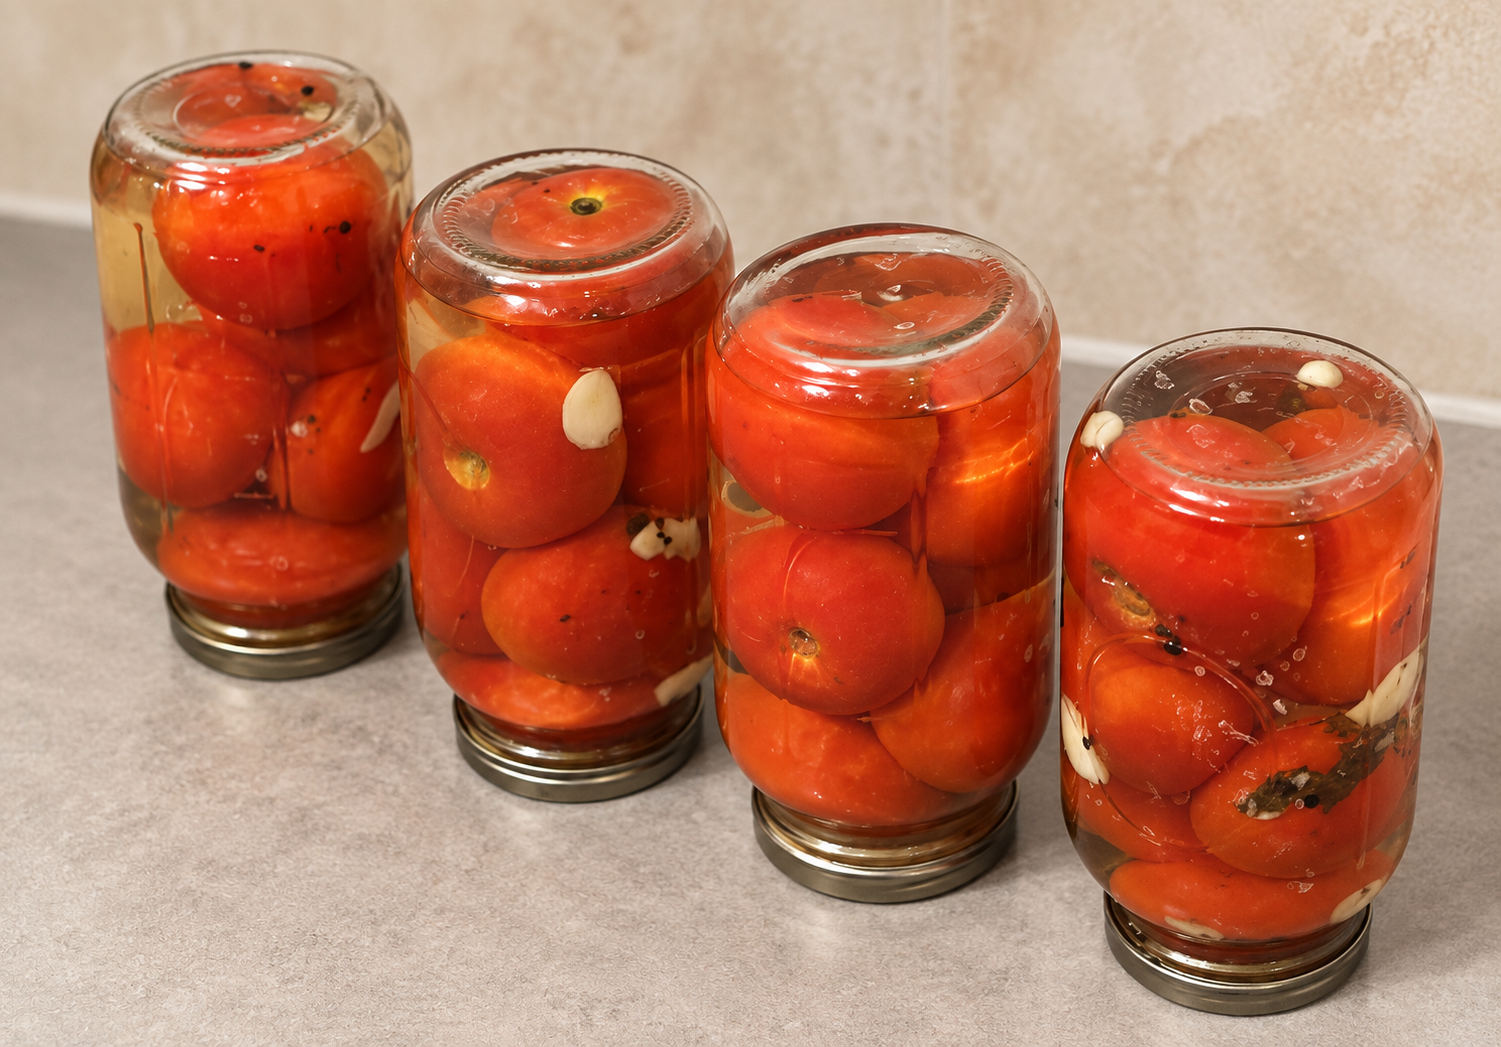
Turn the jars upside down and leave them on a protected surface until completely cool. This brings the hot brine into contact with the lid, reheats the lid, and makes leaks easy to detect.
Check for leaks, label each jar with the preparation date, and leave the jars in a cool, dry place.
Allow approximately one month for salt and acid to diffuse through the tomatoes. By then, the tomatoes should be evenly seasoned, tender, and ready to eat.
Technical Notes
Chemistry
“Sterilization” is used here in the traditional household sense. The three heating stages progressively reduce contamination and heat the jars, tomatoes, brine, and lids.
Using quantities based on total filled jar capacity makes different batches easier to reproduce. Tomatoes are mostly water, so salt and acid gradually diffuse between the surrounding brine and the liquid inside the tomatoes. The final concentration is therefore closer to the concentration calculated from the full jar volume than from the initially drained water alone.
The present salt level is approximately 3% based on total jar capacity. If too salty the next batch can test 2%, which would require 80 g of salt for two jars.
Storage Note
Check the jars after approximately one week. If the brine becomes cloudy or a lid bulges outward, contamination or active fermentation may have occurred. Discard the jar.
If the brine remains clean and transparent and the lid stays pulled inward, the jar has remained sealed without visible fermentation. Jars prepared by this household method have reportedly remained usable for many years.
This Labor Day weekend, we will be showing recent collection of Leta’s paintings at the booth #70 @ Kings Mountain Art Fair. But you do not have to be seriously interested in buying art to enjoy the trip. It is simply a good excuse to escape into the Santa Cruz Mountains and spend a full day among the redwoods.
There will be burgers, beer, ice cream and live music. Children can disappear into games and crafts at Kiddie Hollow, while adults explore more than 125 artists showing paintings, jewelry, furniture and many other things that are difficult to classify.
Parking along Skyline Boulevard can fill quickly during peak hours. If your car ends up some distance away, the fair provides a free, almost luxurious shuttle bus to bring you back through the forest.
After the fair, you can continue along Skyline, take a short hike and find a view of the ocean. Or, on Saturday or Sunday, finish the day at The Mountain House, an upscale restaurant almost next door. Reservations are strongly recommended.
The forecast is sunny and pleasantly cool, roughly in the low 70s. After the recent California heat, that alone may justify the drive.
Kings Mountain Art Fair, Woodside, CA
See you at Kings Mountain Art Fair Booth #70, Leta Eydelberg September 5-7, 2026 10:00 a.m. to 5:00 p.m. 13889 Skyline Boulevard, Woodside, CA Free admission and parking
If you’re looking for a simple weekend outing in the Bay Area, the Palo Alto Festival of the Arts is worth adding to your list.
The festival transforms several blocks of downtown Palo Alto into an open-air gallery filled with artists, craftspeople, food vendors, musicians, and thousands of visitors enjoying a relaxed summer atmosphere.
One of the nicest aspects of the event is its variety. Fine art paintings are displayed alongside photography, handmade leather goods, jewelry, ceramics, decorative pieces, and many other handcrafted items. Even visitors who don’t usually think of themselves as art collectors often discover something unexpected.
The festival is also an excellent place to look for gifts. Handmade items have a different character than mass-produced products, and many pieces are practical enough to become part of everyday life at home.
And, of course, there is food. Street vendors, cafés, restaurants, snacks, desserts, and a cold beer on a warm California afternoon turn the visit into much more than an art event.
Even if you don’t plan to buy anything, simply walking through the exhibits and talking with artists can be rewarding. There is something refreshing about spending a few hours away from screens, surrounded by creativity, music, conversation, and people who still make things with their own hands.
If the weather cooperates, the festival makes for an easy and enjoyable day trip.
Vodafone is a good European carrier. It makes it easy to obtain a local phone number and provides plenty of data, calling, and roaming options immediately upon arrival.
What You Can Get
A potentially permanent local European phone number. A simple solution for locals as well as travelers who visit Europe several times a year.
Do not neet to pay constantly:
Let the plan expire after the first month if you do not need it again immediately.
Reactivate it when you return to Europe.
An easy way to keep the same number
Recharge the account once every six months to keep the number active indefinitely.